How to Move Gym Equipment
Relocating home gyms can be a challenge. Exercise equipment is heavy and awkward, which makes it difficult to carry. Some devices, like ellipticals, cable machines, and stationary bikes, contain sensitive electronics or complex systems of cords and pulleys that require delicate handling. For this reason, many homeowners hire movers to help them disassemble, transport, and set up their home gyms, to ensure their weights and machines are delivered and installed safely. However, for those who prefer the DIY approach, in this blog we’ll share a few professional tips on how to move gym equipment during a long-distance move, based on our experience with home fitness centers.
Create an Inventory
Before you do anything, make a list of all the gym equipment you own. Write down any information you might need to consult during shipping, disassembly, or setup, such as:
- Type, Brand, and Model
- Approximate Weight
- Height, Width, and Length
- Power Requirements (120 volts, 240 volts, etc.)
Include small equipment as well, such as mats, resistance bands, and plyometric boxes, which can be easy to overlook during a busy move. If the weight and dimensions of your machines aren’t listed on their nameplate, check the manufacturer’s specifications. You can find them in the owner’s manual or online.
Measure Your Space
Gym equipment is designed to improve fitness, not glide down corridors and stairwells. As a result, routes need to be carefully planned so your equipment doesn’t scuff the walls and get caught in tight corners. Besides measuring doorways and hallways, check ceiling heights as well. Some fitness devices, like power racks, are light enough to lift but too tall to fit through low doorways.
If you can, measure the space in your new home as well. You don’t want to arrive and discover that your equipment needs to be dismantled before it will fit through the door.
Consult Your Owner’s Manual
Like furniture, it’s easiest to move gym equipment in pieces rather than intact. However, most have specific instructions for assembly and disassembly. Your owner’s manual should walk you through the process step-by-step. If you can’t find it, they’re normally available for download on the manufacturer’s website.
YouTube is also a good resource. If there aren’t any videos on disassembly and transport, search for assembly videos and reverse the process, beginning with the final step and working backwards. However, before taking everything apart, double-check your warranty to make sure you won’t void your coverage by breaking equipment down on your own.
Gather Your Moving Supplies
Because gym equipment is often both heavy and delicate, moving it requires some specialized materials. You’ll likely need:
- Furniture Dolly Rated for 600 Pounds or More
- Ratchet Straps
- Socket Wrench Set with Multiple Sizes
- Allen Wrench or Hex Key Set
- Moving Blankets
- Plastic Stretch Wrap
- Bubble Wrap
- Packing Tape
- Packing Peanuts
- Furniture Sliders
- Resealable Plastic Bags (For Hardware)
- Permanent Marker
In addition to moving supplies, you’ll also need at least 2-3 people to help lift and guide your equipment. Fitness machines can weigh several hundred pounds, and their mass is not always evenly distributed. For instance, treadmills are heavier in front, where the motor’s housed. While dumbbells and weight plates generally aren’t difficult to carry, never attempt to move workout devices on your own. Even simple items, like weight benches, require at least two people to lift safely.
Cover Floors and Doorframes
After you’ve planned your route through your home, you’ll need to protect it. Due to their bulky construction, exercise machines can cause serious damage if you’re not careful. Some of the most common issues people experience are:
- Gouged Floors
- Broken Tiles
- Torn Carpets
- Cracked Door Jambs
In some cases, the concentrated weight can even damage the supportive structures under your floor. To protect your home:
- Lay cardboard or moving blankets along your route. Tape them down to keep them from shifting.
- Use a dolly with wide, rubber wheels instead of plastic ones. It prevents gouging and distributes the weight evenly over your floor.
- Tape cardboard or moving blankets over doorways. If you need to navigate a sharp corner, add some additional padding to protect it from scuffs and dents.
Be sure to practice proper moving techniques as well. Keep your back straight when lifting equipment, using your knees for leverage. If you have to move a machine in or out of a tight space, use furniture sliders instead of dragging it across your floor. Made from hardened discs of plastic or rubber, furniture sliders fit under the legs of your machines, allowing you to push or pull them without scratching your floorboards or ripping up carpet fibers.
How To Move Common Gym Items
The most important thing to remember when moving gym equipment is that small doesn’t mean light. Even a machine’s individual components can weigh 100 pounds or more. And while they’re designed for simple activities, fitness devices are sophisticated machines containing motors, computers, and complex wiring, so they require an unusual amount of time and effort to break down and transport.
Because of the huge range of strength and conditioning equipment available for purchase, we can’t cover every type of machine on the market. Nonetheless, here are the best moving strategies for the items we encounter most often in home gyms.
Treadmills
Undoubtedly the most common fitness machine in America, treadmills can be broken down into three main parts: the console, frame, and motor, which powers the belt system. To disassemble your treadmill:
- Unplug and secure the power cord by taping it to the frame.
- Remove any accessories, such as cup holders, safety keys, or tablet mounts.
- Fold the deck and engage the locking mechanism. This is a standard feature on most treadmills produced in the last 20 years. If your deck doesn’t fold, you’ll need to remove it entirely with the help of 2-3 people.
- Detach the console according to the manufacturer’s instructions, but only after taking a picture of the wire connections to serve as a guide during reassembly.
- After carefully disconnecting the wires, wrap the console in a protective layer of bubble wrap. Experts recommend transporting it in your car, not the moving van.
After the treadmill has been fully disassembled:
- Place it onto the dolly front end first. This is the heaviest part of the machine and needs the most support.
- Secure it to the dolly with ratchet straps.
- Roll it slowly through your house and out to the van, with one person in front guiding the treadmill and two others pushing it from the back. Try not to tilt it, since this puts stress on the motor.
- Once you reach the truck, stand the treadmill upright and strap it to the side of the van. Don’t stack anything on top of it, since the added weight can cause the motor to become misaligned.
Ellipticals
Ellipticals are top-heavy, with several moving parts, so you’ll need to keep careful track of their connecting hardware. As you remove each component, place the nuts and screws in their own, clearly labeled plastic bag. To dismantle your elliptical:
- Unplug the power cord and tape it to the frame.
- Remove the pedal arms and wrap each one in a moving blanket or bubble wrap. Since they aren’t interchangeable, each one needs to be carefully labeled left or right.
- Unscrew the console, but only after taking a picture of the wiring, so you have a visual guide when you reassemble it. Make sure it’s fully sealed in bubble wrap or moving blankets.
- Take off the resistance knob to prevent it from breaking. Some ellipticals control resistance electronically, so don’t be surprised if your model doesn’t have one.
- Unfasten and remove any accessories, like water bottle or tablet holders. If they’re fixed to the frame, cover them in bubble wrap.
Once the unit has been fully disassembled, cover it with moving blankets for protection. Make sure every inch is covered and use plastic wrap to hold it in place. Some ellipticals have sealed construction, meaning they have to be moved in one piece. In this case, you’ll need to be mindful of ceilings and doorways, since the pedal arms add 12-18 inches of height. To move:
- Center the base on the furniture dolly
- Go slowly, with two people on each side to maintain balance
- When going downstairs, go one at a time, resting the base of the unit on each step as you descend.
- Place the elliptical up against the wall of the moving truck and secure it with ratchet straps.
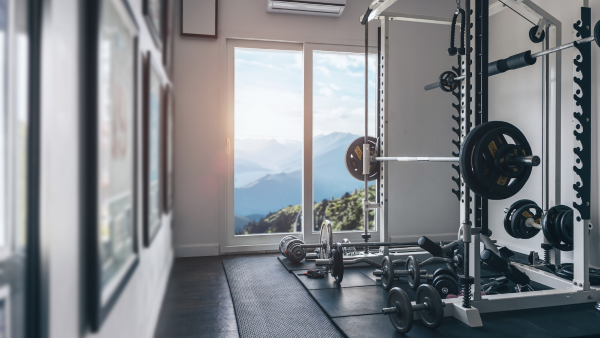
Power Racks
Because they’re made to hold barbells and weight plates, freestanding power racks can weigh more than 600 pounds. Due to their size, most cannot fit through standard doorways and have to be dismantled before they can be moved. Take them apart by:
- Removing weights and accessories: safety bars, J-hooks, landmine attachments, pull-up bars, etc.
- Unbolting the top crossbars with a socket set or wrench. Wrap them in moving blankets (secured by plastic wrap), label them, and set aside. Place the bolts in a plastic bag for safekeeping.
- Unscrewing the anchor bolts, if the unit is secured to the floor.
- Disassembling the main uprights by detaching the vertical posts from the base frame. Wrap them in moving blankets, label them, and set them aside, same as the crossbars.
While it’s possible to dismantle a power rack on your own, it’s best to have at least one person holding the bars as you unbolt them, to prevent them from tipping over. Due to the length of the vertical posts and crossbars, have someone watching to make sure they don’t snag on walls or doorways while going around corners.
Most components are light enough to carry, though we recommend using two people for anything over 50 pounds. Power racks are made of heavy-duty steel, so they can simply be laid on the floor of the moving van. You can also secure them upright, to free up additional floor space.
Cable Machines
Cable systems are intricate and complex, which is why manufacturers generally suggest hiring a professional to disassemble and reassemble them for you. However, if that’s not an option, you can dismantle them yourself by following these steps.
- Photograph the cable system from multiple angles. You want a complete visual guide to ensure each cable is installed correctly when you set it up again.
- Release the tension from the cables one at a time. Be sure to mark each cable’s origin and destination point to simplify reassembly.
- Remove each weight in the weight stack. They’ll be transported separately. (See the section on weights and barbells below.)
The final step would be to take apart the frame. However, some manufacturers recommend transporting cable systems as a single unit, rather than in pieces. Consult your owner’s manual for information specific to your model.
If you can dismantle the frame, wrap each piece in moving blankets, secured with plastic wrap. Make sure the nuts and bolts are stored in a plastic bag with a clear label and transfer each part out to the van. If the machine has to be transported in one piece, load it upright on the dolly and move it carefully through your home, with at least one person on each side to keep it stable. If you have low doorways, you will need to tip it over as you pass through, which may require additional help.
Once inside the van, place the heaviest components directly on the truck bed. If the frame is still intact, place it against the wall and secure it with ratchet straps. Seats, handles, and other accessories can be tucked away in empty spaces where they won’t shift around.
Stationary Bikes
Though it might seem complicated, moving a stationary bike is relatively straightforward. To prepare them, all you need to do is:
- Remove the pedals.
- Lower the seat to its minimum height.
- Turn the handlebars parallel to the frame.
Stationary bikes typically weigh 80-150 pounds, making them lightweight compared to other home exercise machines. To transport, wrap them in moving blankets and place them on the dolly before wheeling them out to the moving van.
Have at least two people present to prevent the bike from tipping over. Use ratchet straps to secure the bike to the wall or anchor points, to prevent it from falling during the journey to your new home. To ensure stability, wrap the straps around the seat and handlebars.
Weight Plates and Dumbbells
A full barbell and dumbbell set can weigh up to 1,000 pounds, so be sure to follow proper lifting, carrying, and loading techniques to prevent muscle strain.
Light weights can be packed into small, sturdy moving boxes. Avoid large boxes to prevent overloading, which can lead to ripping, tearing, and muscle strain. Limit each box to 50 pounds or less and write the weight on each side. Finding boxes for larger weights can be difficult. If you can’t locate a box large and sturdy enough, wrap them in moving blankets, place them directly on the truck bed, and strap them down to prevent them from shifting during transit.
Weight plates are made of iron, so they won’t break, even if dropped, but their outer enamel can be chipped or cracked. Protect their appearance by placing a layer of bubble wrap between them. Towels and blankets work equally well, as long as they’re thick.
Dumbbells can be made of iron, rubber, or urethane, which can become cracked, chipped, and scuffed if shipped without protection. Wrap them in bubble wrap or packing paper if they’re under 20 pounds.
Once the weights are boxed up, keep them stable by filling the empty spaces around them with packing peanuts. Barbells can’t be broken down or boxed up. Instead, wrap them in moving blankets and lay them flat in the truck. While they’re strong, they can bend if you stack heavy objects on top of them, so it’s best to set them off to the side.
Benches and Weight Racks
Benches are relatively easy to break down. Start by folding the bench flat and securing it with the locking pin. Then remove any pad attachments and pack them in boxes, if they’re small enough. Use packing peanuts for cushioning. Wrap any pieces that won’t fit in moving blankets to protect their upholstery.
Once you’ve removed all the detachable sections from the frame, wrap it in blankets as well and take it out to the truck on the dolly. A standard weight bench is not particularly heavy, only 35-50 pounds. However, they’re awkwardly shaped, so you’ll probably need two people to carry them safely through your home.
Small weight racks are surprisingly light, typically 10-35 pounds, though large ones can weigh 75-110 pounds. Most are constructed from simple steel shelves, held together by nuts, bolts, and screws, so breaking them down is fairly easy. Once you’ve finished dismantling, make sure the hardware is stored safely in a plastic bag. Then wrap each component in moving blankets and carry them out to the truck.
Rowing Machines
There are three types of rowing machines: air rowers, water rowers, and magnetic rowers. To move air rowers:
- Slide the seat to the front.
- Separate the front section, with the flywheel, from the back section, with the seat rail. Once separated, each section is relatively easy to move.
- Slide the seat off and box it up with packing peanuts for cushioning. If it doesn’t slide off, strap it in place with plastic stretch wrap.
- Make sure the handle is secured in its cradle, then wrap the handle and chain with bubble wrap or moving blankets.
- Remove the monitor and box it separately.
- Add a layer of bubble wrap to vulnerable sections, like the rail ends and monitor arm.
- Wrap the rail and frame in moving blankets.
To move water rowers:
- Drain the tank.
- Slide the seat forward and lock it in place with bungee cords or plastic wrap.
- Place the handle in its cradle and wrap it in bubble wrap.
- Add extra padding around the tank, either bubble wrap or moving blankets.
- Cover the rest of the frame with moving blankets.
To move magnetic rowers:
- Unplug the unit and remove the batteries from the console.
- Fold the rower and lock it in place. Use plastic wrap or bungee cords as extra protection, to ensure it doesn’t snap back
- If the rower splits, slide the seat forward and separate the two sections.
- Detach the display, if possible, and box it separately. Otherwise protect it with bubble wrap.
- Immobilize the handle by placing it in its cradle, then wrap it and the resistance section with bubble wrap or moving blankets.
Regardless of which rower you own, transport it vertically. Strap it to the side of the van, with the flywheel, tank, or resistance unit facing downwards.
Setting Up Your New Gym
Before reassembling your fitness equipment, inspect and prepare your new exercise room. Locate the outlets, check ventilation, and make sure the floors are even. If you plan on installing a mirror or rubber floors, make sure it’s done before you start setting up your equipment. Some exercise machines require 20-volt dedicated circuits, so you may need to consult with an electrician to ensure you have sufficient power.
To assemble your machines, collect the components and hardware and follow the steps listed above in reverse order. If you have multiple machines, make sure the components are clearly labeled so you can keep them organized when you bring them inside. Take some time to consider the layout as well. Experts recommend:
- Placing treadmills and ellipticals by windows
- Keeping power racks away from mirrors
- Positioning cardio equipment at least 36-inches apart
Calibrate each machine as soon as you’ve finished setting it up. You want to make sure it’s working properly before your first workout, both for its safety and yours.
When to Consider Professional Help
Moving exercise equipment on your own saves money, but there are some circumstances where movers are the better option. Consider asking for professional help if:
- Your own a piece of equipment that weighs more than 300 pounds
- There are multiple large machines in your home
- Either location requires you to carry equipment upstairs or downstairs
- You have difficulty lifting 50 pounds on your own
- Any of your machines are under warranty
Sophisticated equipment such as Peloton, Technogym, and Precor machines contain sensitive electronics and hardware that require specialized tools and knowledge. As such, dismantling them on your own often leads to miscalibrations, safety issues, and permanent damage. To avoid problems, their manufacturers strongly suggest customers hire a trained technician instead of tackling the project themselves.
Allied Household Moving Services
Allied has been helping Americans relocate for nearly 100 years. In addition to household goods, our teams have plenty of experience with specialized relocation services. Whether you need help with a game room, workshop, or home gym, our moving professionals have the training and skills to handle your high-value items. From planning to packing to shipping, storage, and final delivery, we make your journey easier every step of the way. Contact us today for a free quote!